



How to Build a Tiny House from a Shipping Container: 10 Steps
Building a tiny house from a shipping container requires more than adding doors, windows and interior finishes.
The project must address local permits, container condition, foundations, structural reinforcement, corrosion protection, insulation, plumbing, electrical systems, ventilation and final inspection.
This guide explains the complete process in 10 practical steps, from choosing a suitable container to completing the finished home.
A converted cargo container is also different from a purpose-built container house. Understanding this difference can help you select the most practical option for your project.
This guide provides a general project overview. Foundations, lifting, structural modifications, electrical work, plumbing and local compliance should be reviewed by qualified professionals.
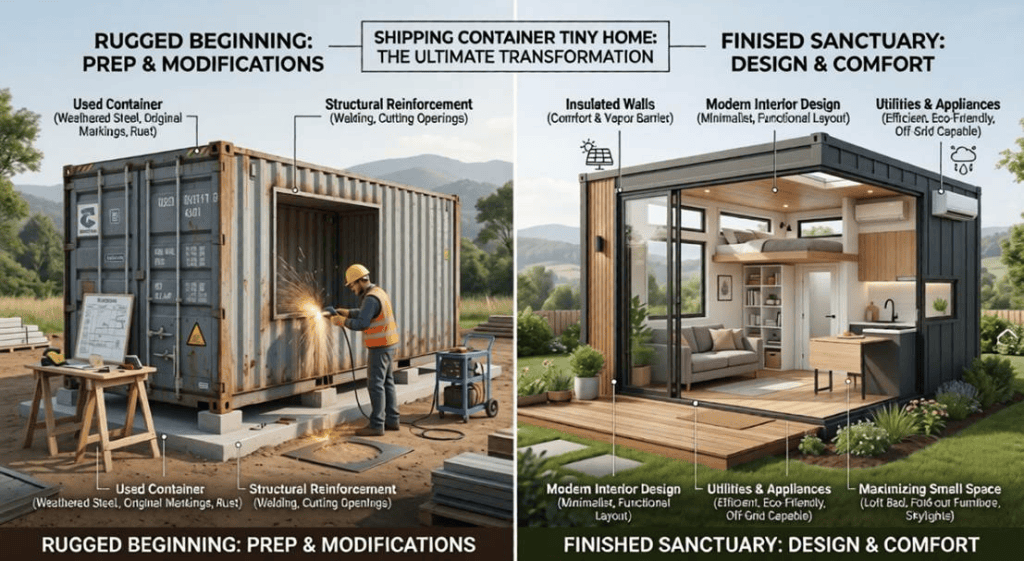
Quick Answer: How Do You Build a Shipping Container Tiny House?
To build a shipping container tiny house:
- Check local zoning, codes and permits.
- Set the project budget and complete the design.
- Choose and inspect a suitable container.
- Prepare the site and foundation.
- Deliver, position and secure the container.
- Cut openings and reinforce the structure.
- Install doors, windows and weatherproofing.
- Install plumbing, electrical and HVAC systems.
- Add insulation and control condensation.
- Complete the interior, exterior and final inspection.
The exact sequence may vary, but structural design, utility planning and moisture control should be completed before permanent finishes are installed.
Shipping Container Conversion vs Purpose-Built Container House
A converted shipping container and a purpose-built container house are not the same building system.
A converted container reuses an intermodal cargo container as the main structural shell. A purpose-built container house is manufactured specifically for residential, office or accommodation use.
| Comparison | Converted Shipping Container | Purpose-Built Container House |
| Original purpose | Cargo transportation | Residential or commercial building |
| Main structure | Existing container shell | Purpose-designed steel frame |
| Wall system | Corrugated steel with added insulation | Integrated insulated wall panels |
| Doors and windows | Openings cut into the shell | Planned during factory production |
| Interior width | Reduced after framing and insulation | Designed around usable room space |
| Condition | Depends on age and previous cargo | New factory-manufactured materials |
| Structural work | Cutting and reinforcement usually required | Openings integrated into the design |
| Best suited to | Individual conversions and architectural projects | Repeatable homes, offices and accommodation |
ZN House mainly supplies purpose-built modular container houses. These units can be more practical where buyers require predictable specifications, factory-installed wall systems, planned openings and faster site assembly.
Is a Shipping Container Tiny House Right for You?
A container conversion can create a distinctive compact home, but it also has important limitations.
| Potential Advantages | Main Limitations |
| Existing steel shell | Narrow internal width |
| Compact modular format | Insulation reduces usable space |
| Distinctive industrial appearance | Steel transfers heat quickly |
| Can reuse an existing container | Condensation must be carefully controlled |
| Suitable for small layouts | Large openings require reinforcement |
| Can be combined with other units | Total cost extends far beyond the container price |
A shipping container tiny house is best suited to a compact, customized project where local approval, structural modification and moisture control can be properly managed.
20ft vs 40ft Shipping Container for a Tiny House
The best container size depends on the number of occupants, room layout and intended use.
| Container Type | Approximate External Footprint | Suitable Applications | Main Limitation |
| 20ft standard | About 160 sq ft | Guest room, office or compact studio | Very limited internal layout |
| 40ft standard | About 320 sq ft | Studio or compact one-bedroom home | Limited ceiling height after insulation |
| 40ft high cube | About 320 sq ft | Full-time living and more complete layouts | Greater delivery and lifting requirements |
A high-cube container provides additional internal height, which can help accommodate ceilings, insulation and utility routes.
However, the final usable floor area will be smaller than the external footprint after installing wall framing, insulation, plumbing zones and cabinetry.
Before choosing a container size, consider:
- Number of occupants
- Full-time or occasional use
- Kitchen and bathroom requirements
- Storage requirements
- Insulation thickness
- Delivery access
- Available site area
- Future expansion plans
10 Steps to Building a Tiny House
Step 1: Check Zoning, Codes and Permits
Before buying a container, confirm whether the proposed site can legally support a container-based home.
Contact the local planning or building authority and ask:
- Is residential use permitted on the property?
- Are shipping container homes allowed?
- Is the project treated as a conventional, modular or temporary building?
- Are architectural and structural drawings required?
- What foundation requirements apply?
- Are energy-efficiency and fire-safety rules applicable?
- Are electrical and plumbing inspections required?
- Are there minimum ceiling-height or room-size requirements?
- Are there neighborhood or homeowners’ association restrictions?
Possible approval documents may include:
- Site plan
- Floor plan
- Elevations
- Foundation drawings
- Structural calculations
- Door and window schedule
- Electrical plan
- Plumbing plan
- Drainage plan
- Energy or insulation documents
Do not assume that a movable steel container is automatically exempt from building approval. Once it is used as a residence and connected to a foundation or utilities, local construction requirements may apply.
Step 2: Set the Budget and Complete the Design
A realistic project budget should include much more than the purchase price of the container.
Start by confirming:
- Primary residence, guest house or holiday unit
- Number of occupants
- Required bedrooms
- Kitchen size
- Bathroom configuration
- Utility connection or off-grid operation
- Interior finish level
- DIY and contractor responsibilities
- Expected service period
- Target completion date
Main Budget Categories
| Cost Area | Typical Items |
| Container | Purchase, inspection and documentation |
| Delivery | Trucking, permits, crane and positioning |
| Site work | Clearing, grading, access and drainage |
| Foundation | Excavation, concrete, anchors and engineering |
| Design | Layout, drawings and structural review |
| Structural work | Cutting, welding and reinforcement |
| Weatherproofing | Rust repair, coatings, flashing and sealants |
| Insulation | Thermal, air and vapor-control materials |
| Utilities | Plumbing, electrical, wastewater and HVAC |
| Interior finishes | Walls, ceilings, flooring, kitchen and bathroom |
| Exterior work | Cladding, roof, stairs, deck and landscaping |
| Approval | Permit fees, inspections and testing |
| Contingency | Unexpected repair or site costs |
The container itself is only one part of the total budget. Foundations, transportation, structural work, insulation and utilities often represent a substantial share of the completed project cost.
Plan the Floor Layout
The interior of a shipping container is narrow, so the layout should be simple and efficient.
Useful design principles include:
- Keep circulation routes direct.
- Place the kitchen and bathroom close together.
- Minimize unnecessary internal walls.
- Use sliding or pocket doors.
- Plan furniture before fixing window positions.
- Use built-in storage.
- Consider full-height cabinets.
- Preserve space for insulation and utilities.
Complete the layout and structural design before cutting any openings.
Step 3: Choose and Inspect the Container
Shipping containers vary significantly in age, condition and previous use.
One-Trip Container
A one-trip container has usually completed a limited number of cargo journeys.
Advantages may include:
- Cleaner steel surfaces
- Fewer dents
- Less corrosion
- Better door seals
- More predictable condition
- Lower preparation requirements
It normally costs more but may reduce repair work.
Used Container
A used wind- and watertight container may still be suitable if the main structure remains in acceptable condition.
Possible problems include:
- Surface corrosion
- Deep rust
- Large dents
- Roof deformation
- Worn door seals
- Previous welded repairs
- Damaged flooring
- Unknown cargo history
- Chemical odors
Container Inspection Checklist
Before purchasing, check:
Structural condition
- Corner posts
- Top and bottom rails
- Roof condition
- Wall deformation
- Door-frame alignment
- Floor cross-members
- Previous repairs
Corrosion
- Lower rails
- Roof edges
- Welded areas
- Door frame
- Floor underside
- Cut or repaired sections
Interior condition
- Strong odors
- Oil stains
- Standing water
- Mold
- Damaged flooring
- Unintended holes
Documentation
Ask about:
- Container age
- Identification markings
- Previous cargo
- Repair history
- Delivery condition
- Available seller warranty
Avoid selecting a container only because it has the lowest price. A heavily damaged unit may require more repair and reinforcement than a cleaner one-trip container.
Step 4: Prepare the Site and Foundation
A shipping container home should not be placed directly on untreated ground.
The foundation must support the building, maintain level alignment and reduce exposure to soil moisture and standing water.
Site Preparation
Review:
- Soil conditions
- Drainage direction
- Flood risk
- Finished floor level
- Truck access
- Crane operating space
- Utility routes
- Septic or sewer connection
- Overhead cables
- Temporary storage space
The site should also allow water to flow away from the building.
Common Foundation Options
| Foundation Type | Typical Use |
| Concrete piers | Small single-container projects |
| Strip foundation | Continuous support along selected walls |
| Concrete slab | Full ground-level support and finished floor integration |
| Engineered steel supports | Projects requiring elevated or adjustable support |
The correct foundation depends on:
- Soil bearing capacity
- Container quantity
- Building arrangement
- Wind conditions
- Seismic requirements
- Frost depth
- Drainage
- Local engineering standards
Utility entry points should be planned before the container is positioned.
Step 5: Deliver, Position and Secure the Container
Container delivery requires careful access and lifting planning.
Before delivery, confirm:
- Truck route
- Gate width
- Turning radius
- Ground condition
- Crane reach
- Overhead cables
- Container orientation
- Foundation location
- Nearby structures
- Weather conditions
A crane, telehandler or suitable lifting system may be required depending on the site and container position.
After placement:
- Confirm the container direction.
- Check alignment with the foundation.
- Verify that the unit is level.
- Check the required spacing between containers.
- Secure the unit using the designed foundation connections.
- Confirm that the original container doors still operate correctly.
Do not begin structural cutting until the container is correctly positioned and supported.
Step 6: Cut Openings and Reinforce the Structure
Shipping container walls contribute to the structural behavior of the shell.
Cutting large openings for doors, windows or connections between units can change the load path and reduce stiffness.
Complete Reinforcement Before Large Sections Are Removed
Depending on the project design, reinforcement may include:
- Steel perimeter frames
- Box-section columns
- Headers
- Posts
- Beams
- Additional bracing
- Reinforced module connections
Mark All Openings
Confirm the positions of:
- Entrance doors
- Windows
- Internal doors
- Openings between containers
- Plumbing penetrations
- Electrical entries
- Ventilation openings
- HVAC routes
Check all measurements against approved drawings.
Cutting and Welding
Cutting and welding should be completed by experienced personnel.
Important requirements include:
- Temporary structural support
- Fire safety
- Ventilation
- Protection of nearby surfaces
- Control of sparks
- Treatment of newly exposed steel
- Repair of damaged coatings
For multi-container projects, also coordinate:
- Structural connections
- Roof joints
- Internal floor transitions
- Wall and ceiling closures
- Waterproofing
- Drainage between units
Step 7: Install Doors, Windows and Weatherproofing
Doors and windows should be installed into reinforced openings.
Check:
- Opening dimensions
- Frame position
- Level and square
- Fixing points
- Flashing
- Perimeter sealing
- Drainage routes
- Opening and locking operation
Repair the Steel Shell
After cutting and welding:
- Remove loose rust and contamination.
- Prepare exposed steel.
- Apply the selected primer or protective coating.
- Seal welded areas.
- Treat newly cut edges.
- Repair damaged external coatings.
Complete Rainwater Protection
Weatherproofing may include:
- Window flashing
- Door flashing
- Roof-penetration seals
- Drip edges
- Gutters
- Downpipes
- Exterior roof canopy
- Module-joint covers
- Site drainage
Sealant should support properly designed flashing and drainage. It should not be the only method used to prevent water entry.
Step 8: Install Plumbing, Electrical and HVAC
Utility routes should be planned before insulation and wall finishes are installed.
Plumbing
Coordinate:
- Water entry
- Hot- and cold-water pipes
- Wastewater drainage
- Toilet location
- Shower drainage
- Kitchen connection
- Vent pipes
- Water heater
- Maintenance access
Plumbing may be routed through service walls, floor cavities or ceiling zones depending on the design.
Electrical
The electrical system may include:
- Main distribution panel
- Grounding and bonding
- Lighting
- Sockets
- Kitchen circuits
- Bathroom circuits
- Exterior lighting
- Smoke and safety devices
- HVAC power supply
- Solar or battery connection
HVAC and Ventilation
Heating, cooling and ventilation should be selected according to:
- Climate
- Insulation level
- Air leakage
- Window area
- Solar exposure
- Occupancy
- Internal heat load
A compact heat-pump or mini-split may be suitable for some projects, but the final equipment should be sized for the actual building.
Ventilation is especially important in small homes with kitchens, bathrooms and tightly sealed walls.
Electrical and plumbing systems should be tested before walls and ceilings are permanently closed.
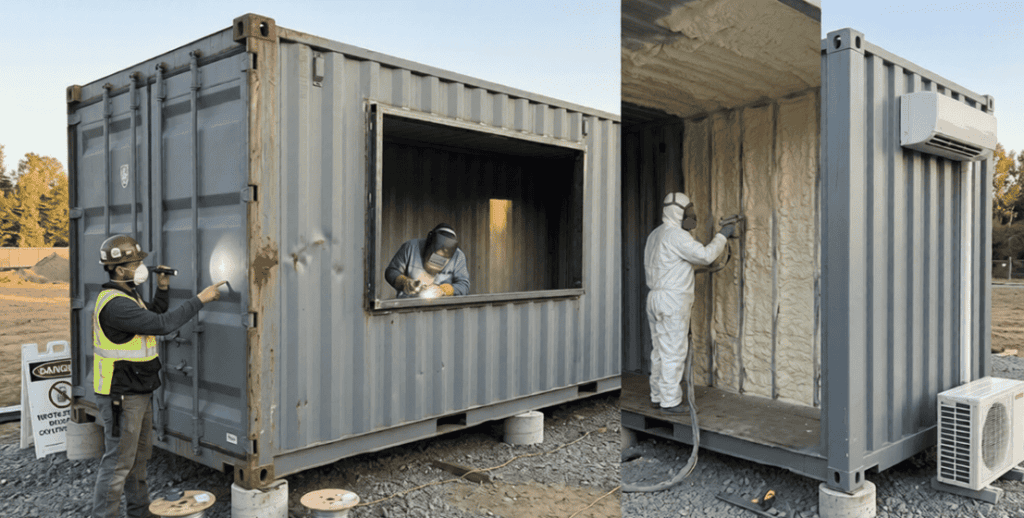
Step 9: Install Insulation and Control Condensation
Steel transfers heat quickly and can create cold or hot interior surfaces.
Insulation should therefore be designed together with:
Common Insulation Options
| Insulation Type | Main Advantage | Main Consideration |
| Closed-cell spray foam | Follows corrugated steel and provides air control | Higher cost and professional installation |
| Rigid foam board | Predictable thickness and continuous coverage | All joints must be carefully sealed |
| Mineral wool | Good fire and acoustic performance | Requires framing and moisture planning |
| Exterior insulation | Preserves more interior width and reduces thermal bridging | Requires exterior cladding |
| Hybrid system | Combines different material advantages | More complex installation |
Condensation Control
Insulation alone does not prevent condensation.
The wall and roof design must also control:
- Air leakage
- Water vapor movement
- Thermal bridges
- Interior humidity
- Ventilation
- Cold steel surfaces
Potential thermal bridges include:
- Steel reinforcement
- Window frames
- Door frames
- Floor cross-members
- Roof connections
- Module joints
Continuous insulation or thermal breaks may be required around these areas.
Step 10: Complete Finishes and Final Inspection
After utility systems have been tested, the interior and exterior finishes can be completed.
Interior Work
Possible work includes:
- Wall lining
- Ceiling finish
- Flooring
- Kitchen installation
- Bathroom installation
- Lighting fixtures
- Cabinets
- Storage
- Interior doors
- Appliances
Space-Saving Interior Ideas
- Full-height cabinets
- Storage under beds
- Fold-down tables
- Sliding doors
- Built-in seating
- Combined kitchen and dining areas
- Light-colored interior finishes
- Covered outdoor living areas
Exterior Work
Possible exterior additions include:
- Protective coating
- Exterior cladding
- Secondary roof
- Entrance canopy
- Deck
- Stairs
- Railings
- Gutters
- Solar shading
- Landscaping
Final Inspection Checklist
| Inspection Area | What to Check |
| Structure | Reinforcement, welds, anchors and connections |
| Foundation | Alignment, support and drainage |
| Steel shell | Coating damage, corrosion and exposed edges |
| Roof | Joints, penetrations, flashing and gutters |
| Doors and windows | Operation, alignment and seals |
| Insulation | Continuity, gaps and penetrations |
| Electrical | Circuits, grounding, lights and safety devices |
| Plumbing | Pressure, drainage, leaks and fixtures |
| HVAC | Operation, controls and ventilation |
| Interior | Floors, walls, ceilings and clearances |
| Exterior | Stairs, guardrails, drainage and site access |
The building should only be occupied after required inspections and approvals have been completed.
Shipping Container Tiny House Cost Breakdown
The completed price of a container tiny house varies by country, container condition, design and level of finish.
Major cost factors include:
- 20ft or 40ft container
- New or used condition
- Delivery distance
- Crane access
- Site preparation
- Foundation type
- Number and size of openings
- Structural reinforcement
- Insulation system
- Kitchen and bathroom specification
- Utility availability
- Interior finish level
- Permit and engineering requirements
A container purchase price should not be treated as the total home price.
Projects with multiple containers, large openings, difficult access or off-grid systems will usually require a higher budget than a basic single-unit conversion.
Common Shipping Container Home Construction Mistakes
Buying Before Checking Approval: The project may not be permitted on the selected property.
Selecting a Container Only by Price: A low-cost unit may require major rust, floor or structural repair.
Cutting Before Structural Design Is Complete: Openings may weaken the shell and require additional reinforcement.
Ignoring Delivery Access:The truck or crane may be unable to safely reach the foundation.
Poor Condensation Control: Insulation without air sealing, vapor control and ventilation may trap moisture against steel.
Completing Finishes Before Testing Utilities:Electrical, plumbing and drainage systems should be tested while connections remain accessible.
Relying Only on Sealant:Waterproofing requires proper flashing, overlaps and drainage paths.
Leaving Coating Damage Exposed:Cutting and welding can expose steel that requires protective treatment.
DIY Conversion vs Purpose-Built Container Home
A DIY conversion may suit a small project where the owner has sufficient time, skills and access to qualified trades.
A purpose-built modular container home may be more suitable where the buyer requires factory production, predictable specifications and faster site assembly.
| Project Factor | DIY Container Conversion | Purpose-Built Container Home |
| Existing condition | Depends on the selected container | New factory-produced components |
| Structural cutting | Usually required | Reduced through planned openings |
| Insulation | Added during conversion | Integrated into wall and roof systems |
| Production location | Mainly at the project site | Mainly in the factory |
| Quality consistency | Depends on local workmanship | Controlled production process |
| Site construction | More cutting and finishing work | More assembly and connection work |
| Best suited to | Individual customized projects | Repeatable homes, offices and accommodation |
For buyers who do not specifically need a reused cargo container, a purpose-built container home may offer a more predictable building system.
Shipping Container Home Maintenance Checklist
Regular maintenance helps reduce corrosion, leakage and utility problems.
Routine Checks
- Keep roof and gutters clean.
- Check drainage around the foundation.
- Inspect doors and windows.
- Look for damaged sealant.
- Monitor indoor humidity.
- Confirm ventilation openings remain clear.
Seasonal Checks
- Inspect roof joints before heavy rain.
- Check exterior coatings.
- Look for rust around cut and welded areas.
- Inspect plumbing and drainage.
- Check air-conditioning and ventilation.
Annual Checks
- Inspect structural connections.
- Check anchors and supports.
- Repair damaged paint or coatings.
- Replace deteriorated sealant.
- Test electrical safety devices.
- Inspect exterior stairs and railings.
Coastal and high-humidity projects may require more frequent corrosion checks.
Frequently Asked Questions
How much does a shipping container tiny house cost?
Cost depends on container condition, delivery, foundations, structural changes, insulation, utilities and interior finishes.
The price of the empty container is only one part of the total project budget.
Is a 20ft container large enough for a tiny house?
A 20ft container can work as a compact studio, guest room or office.
It provides limited space for a full kitchen, bathroom and storage, especially after wall insulation is installed.
Is a 40ft container better for full-time living?
A 40ft or 40ft high-cube container generally provides more layout flexibility for a kitchen, bathroom, sleeping area and storage.
A high-cube container also provides additional ceiling height.
Does a shipping container home need a foundation?
Yes. A container home should be supported on a properly designed foundation rather than placed directly on untreated ground.
The foundation must address structural loads, level alignment, soil conditions and drainage.
What is the best insulation for a shipping container home?
There is no single best insulation for every project.
Closed-cell spray foam, rigid foam, mineral wool and exterior insulation can all be suitable depending on climate, wall design, fire requirements and budget.
How do you prevent condensation in a container home?
Condensation control requires more than insulation.
The design should combine air sealing, vapor control, thermal-bridge reduction, ventilation and indoor humidity management.
Can two shipping containers be connected?
Yes, but openings between containers usually require structural reinforcement.
The project also needs coordinated foundations, roof joints, wall closures, floor transitions and waterproofing.
Do shipping container homes require permits?
Permit requirements depend on location, intended use, foundations, utilities and local building regulations.
The local authority should be consulted before purchasing or modifying the container.
Is it cheaper to convert a shipping container or buy a prefab container home?
A basic conversion may appear less expensive at the beginning, but structural work, insulation, delivery, utilities and site labor can increase the final cost.
A purpose-built prefab container home may offer more predictable specifications and reduced site fabrication.
Need a Custom Container Home Solution?
ZN House provides purpose-built modular container homes for residential, office, accommodation and project applications.
Our team can support:
- Custom floor plans
- Factory-produced steel structures
- Insulated wall and roof systems
- Door and window customization
- Electrical and plumbing preparation
- Kitchen and bathroom configurations
- Packing and international shipping
- Installation drawings and technical support
To receive a suitable recommendation, please provide:
- Project country and location
- Building application
- Required container size
- Number of occupants
- Room requirements
- Preferred interior finish
- Utility requirements
- Delivery schedule
- Site layout or reference drawings
Similar Posts

How Are Modular Buildings Constructed?
Modular buildings are structures constructed from one or more sections, each of which is commonly called…
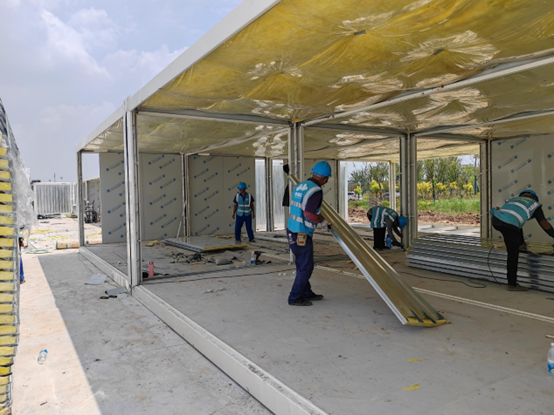
Is a Hurricane-Proof Modular Home the Safest Investment for Coastal Living?
Coastal homeowners have to deal with a distinct challenge every year. To keep their homes safe,…
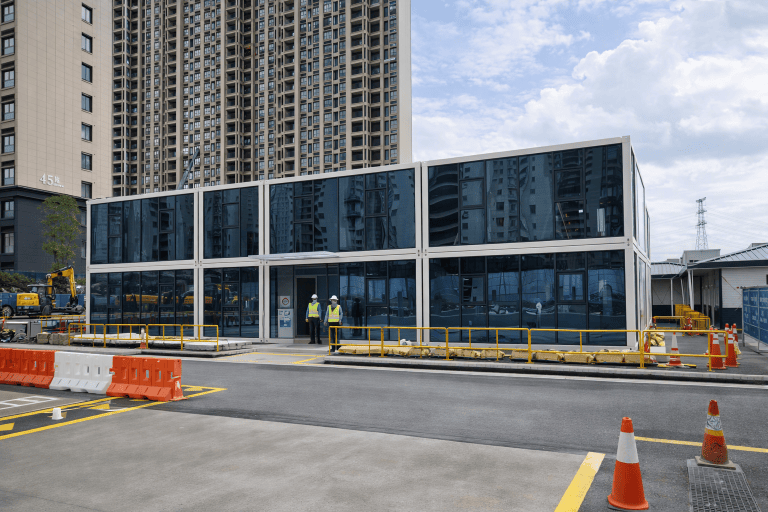
Container Offices: A Practical Guide to Fast, Flexible Workspace Solutions
These days, businesses need office space that can keep up with the changing scenario. A construction…
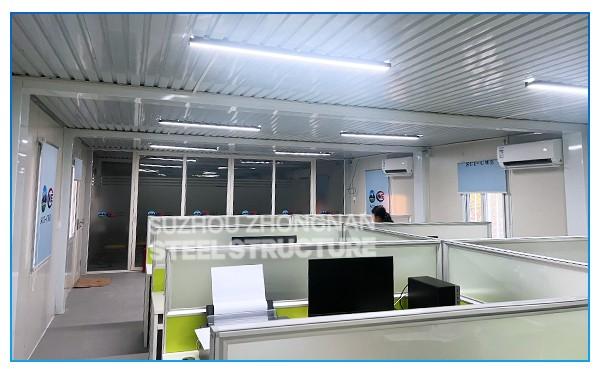
Container House Construction: Expert Advice on for Urban Spaces
Container house construction offers fast, affordable, and eco-friendly urban housing with flexible layouts and strong steel frames.

Foldable container house as a portable classroom
In regions facing educational infrastructure shortages, such as remote areas, disaster-stricken zones, and temporary resettlement communities,…

Folding Container House Office Designs: Revolutionizing Workspaces with Ingenuity
The modern office landscape is shedding its static skin. As businesses embrace flexibility, remote work, and…


